Sunday, September 6, 2020

Simple Stamping Fall 

September 2020


Product List

Fall card 1


Card One


  1. Cut card stock 11” x 4.25” Pretty Peacock
  2. Score, fold and burnish at 5-1/2”
  3. 3-1/8”x5-1/8” Mat 1 Whisper White
  4. 3”x5” Mat 2 Plaid tidings
  5. Sentiment 2”x1-7/16” (1)Whisper White and (1)Bumblebee
  6. 4”x5” insert Whisper White


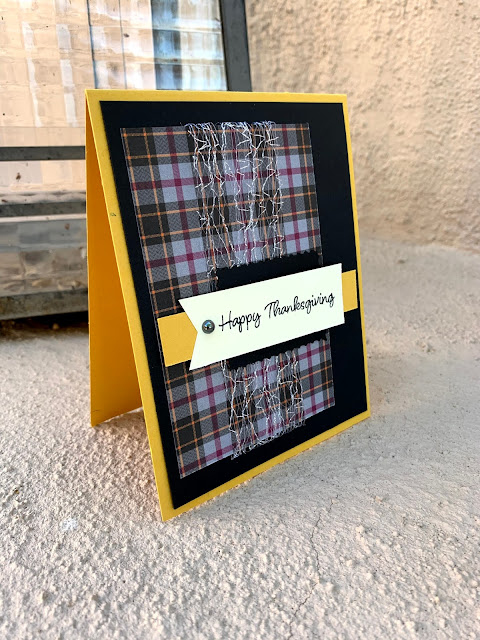
Fall card 2020Card Two  
  1. Cut card stock 11” x 4.25” Bumblebee
  2. Score, fold and burnish at 5-1/2” 
  3. 4”x5”-4/16”  Mat 1 Black 
  4. 3”x4”1/2” Mat 2 Plaid tidings
  5. Attach ribbon around Plaid tidings
  6. Sentiment 2”x1-1/2” Very Vanilla
  7. 3”1/2”x3/4” Background sentiment Bumblebee
  8. 3”x1” Background Black
  9. 4”x5” insert Whisper White (optional)


Fall Card 2020Card Three

  1. Cut card stock 11” x 4.25” Pretty Peacock
  2. Score, fold and burnish at 5-1/2” 
  3. 5”1/4” x 3”-1/2””  Mat 1 Bumblebee
  4. (5) pcs @ 3/4”x4” Plaid tidings
  5. Attach ribbon behind sentiment
  6. sentiment 2”-1/2”x 3/4” whisper white
  7. 4”x5” interior whisper white

Thursday, September 3, 2020

Fancy Fold Stampin'Up!® Birthday Card Nature's Beauty and Itty bitty greetings


There have been many videos how to make this card one I watched is with paper pixie on youtube.
 I adapted this to try to make it a little easier.

I cut the card 11 inches by 4-1/2" and score and burnish at 5-1/2" 
Using a 3" x 3" piece of card stock to measure the front upper right corner mark the lower left side of the paper to within a 1/2 "  top left and side right


Measurements

Card base 11" x  4-1/4" score at 5-1/2"
Mats (3)- 5-1/4" x  4" 
Mats (2)- 3 x 3

See the YouTube video the measurements are below.


hold 3x3" piece of paper 1/2" away from right side and 1/2" from the top. using a light pencil mark the bottom paper and left side of the 3x3"paper. this is where you will cut on the cutter.


post it note 3x3"


You can see the pencil marks so using the cutting tool I pressed the cutter at the top mark and slide it down and stopped at the end. Turning the piece I did the same thing on the second side. Or you can use a ruler and x-acto knife. I prefer the cutting tool since I'm a bit shaky. 


You can shop with me, at

https://www.stampinup.com?demoid=2205140


Product List Product List
Pretty Peacock Classic Stampin’ Pad
$7.50
Pretty Peacock 8-1/2" X 11" Cardstock
$8.75
Lily Impressions Designer Series Paper
$0.00
Nature's Beauty Cling Stamp Set
$21.00
Itty Bitty Greetings Clear-Mount Stamp Set
$36.00

Tuesday, August 25, 2020

Gift Card or Treat Holder

 Gift Card Holder or Treat Holder


measurements recipe
card stock (DSP) 7-5/8" X 3"
Score on long side-1-5/8, 1-7/8",  4-5/8",  4-7/8"

cut sides (Sorry there is a problem on the video I said to score across at 1/4" I meant 1/2" sorry. )
cut 2-3/4" x 2" 
score short side  1/2", 1", 1-1/2",  fold and burnish across

Attache with glue on the one side and fold over the pocket and attach. 
add embellishments as you wish and goodies. 

here is the video 

Product List
Cobwebs 3D Embossing Folder
$9.00
Celebration Tidings Photopolymer Stamp Set (English)
$17.00
Peek-A-Hoot Dies
$34.00
Halloween Magic Dies
$31.00
Magic In This Night Designer Series Paper
$11.50
Black Glitter Paper
$6.00
Adhesive Sheets
$10.00

Saturday, August 22, 2020

1- Card template 3- different designer papers and 2- stamp sets

 Hi crafty friends, 

On my FaceBook live coffee n cards we made three cards using the same template. One of the easiest things to do is find a template you like and try it with different stamp sets and designer series paper. At the bottom is a list of supplies I use in that video. 

Don't forget if you want to see more recipes of the cards and items made in the annual catalogs go to the top right here on my blog and click to see them. 

(warning there are over 100 pages don't try to print them all)

If you make one of the cards here today let me know I'd love to see what you do. 


Recipe

cardbase: 5-1/2" x 4-1/4"

Mat 1: 5-1/4" x 4"

Mat 2: 3-1/4" x 5-1/2"

Sentiment : 2-1/2" x 2-1/2"

Embellishment add on


Product List

Friday, August 21, 2020

How to make your own designer card stock with Stampin' Up!® stamps.

 Hi my crafty friends,

Today I'm going to show you my favorite way of making a card with my own designer paper. I use my stamp set and card stock and go to town.
If you are interested there is a link in the bottom of the page to the products I used for this and of course the video is on my YouTube channel

maryannescreativemix/youtube.com


It's super simple but inside is a surprise and that is the fun feature of this card.

If you would like to see the sample catalog it is located on the top right of the blog. Inside there are the directions for all the cards and items made in the catalogs.

Product List

Monday, August 17, 2020

Gift card holder

 GIFT CARD HOLDER


Want to send my thanks to Paper Pixie for inspiring me to make a full size gift card holder. You can see her treat holder on her YouTube channel.


The instructional video is @maryannescreativemix on YouTube

Here are the measurements using Cinnamon Cider card stock cut 1- 7.75" x 4" score @ 1/2" 2.75", 3", 5.25", 5.5". 

Cut slider 1-4"x2", Tag pull 1-4.5"x2". Mats, 3.75" x 1-15/16 th, 1.75" X 3.25" and scrap vanilla and cellophane or sandwich wrap bag.


Hope you get as good as you give. 

creativemix@StampinUp.com


#29faces day 1

                                #29faces           Martha from I love 2 paint on YouTube started 29 faces in 2012  Martha's Channel here...